Requirements
- uses p5.js and webserial
- web device input causes arduino output
- arduino input causes web device output
- 2 sources of input and 1 output device
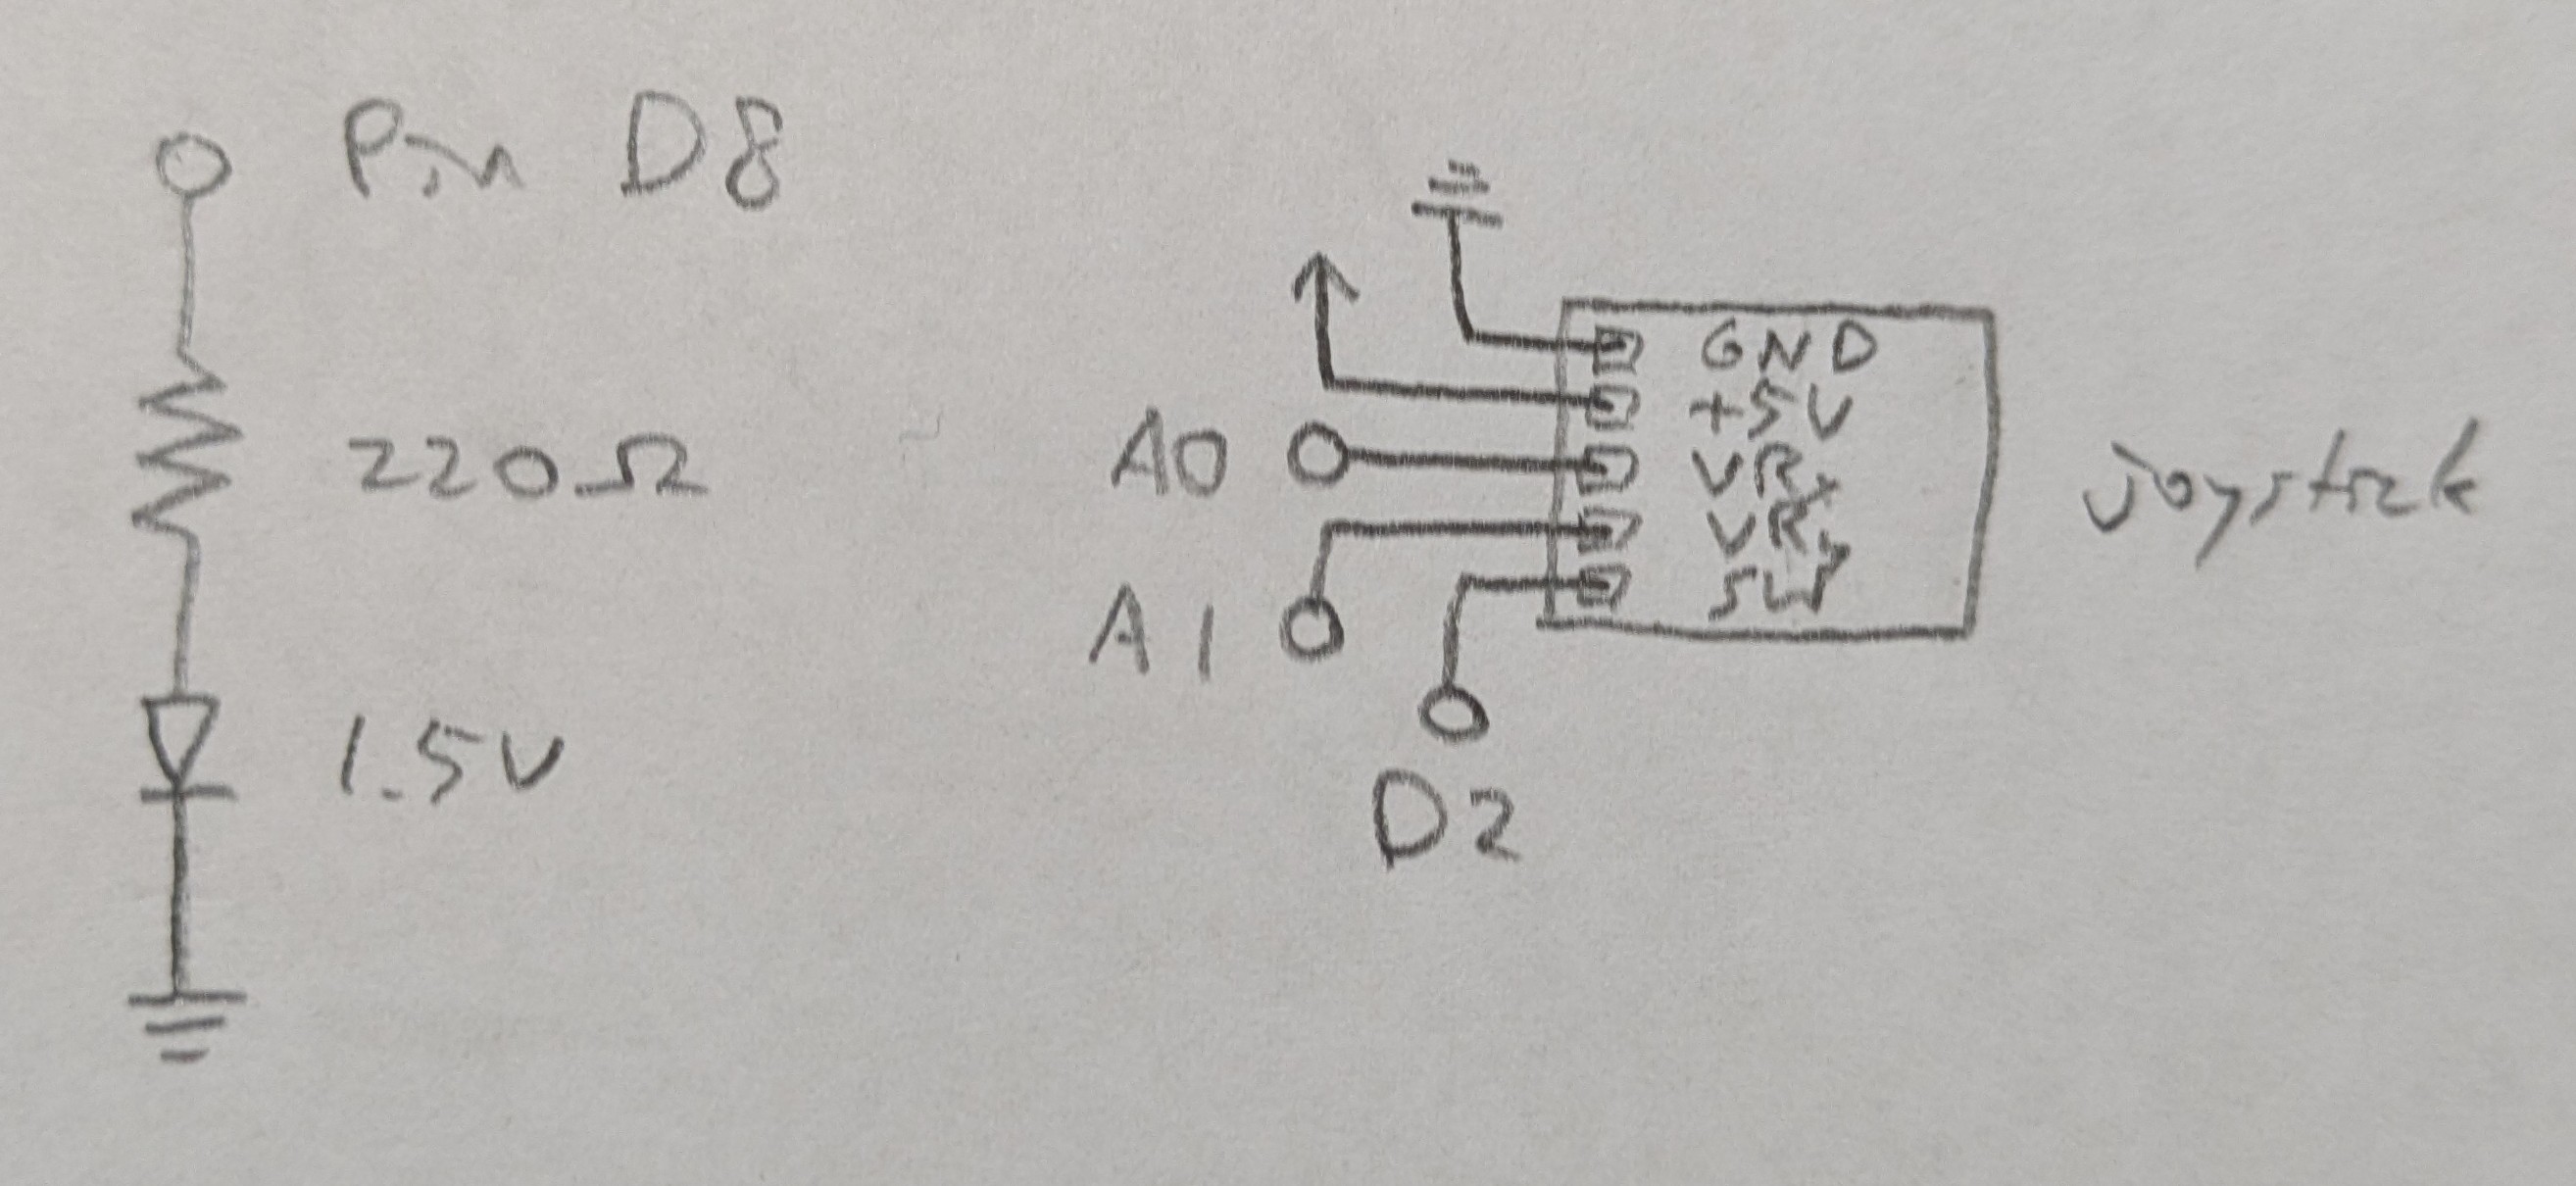
Schematic
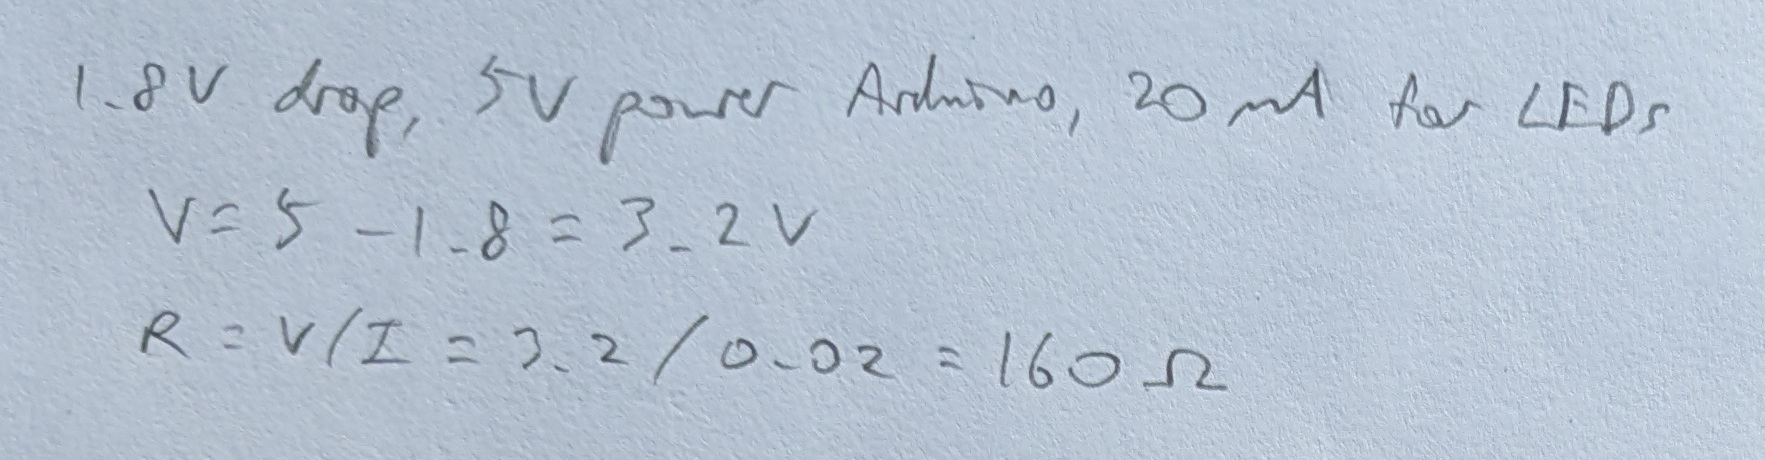
Calculations
Resistance needed for yellow LED:
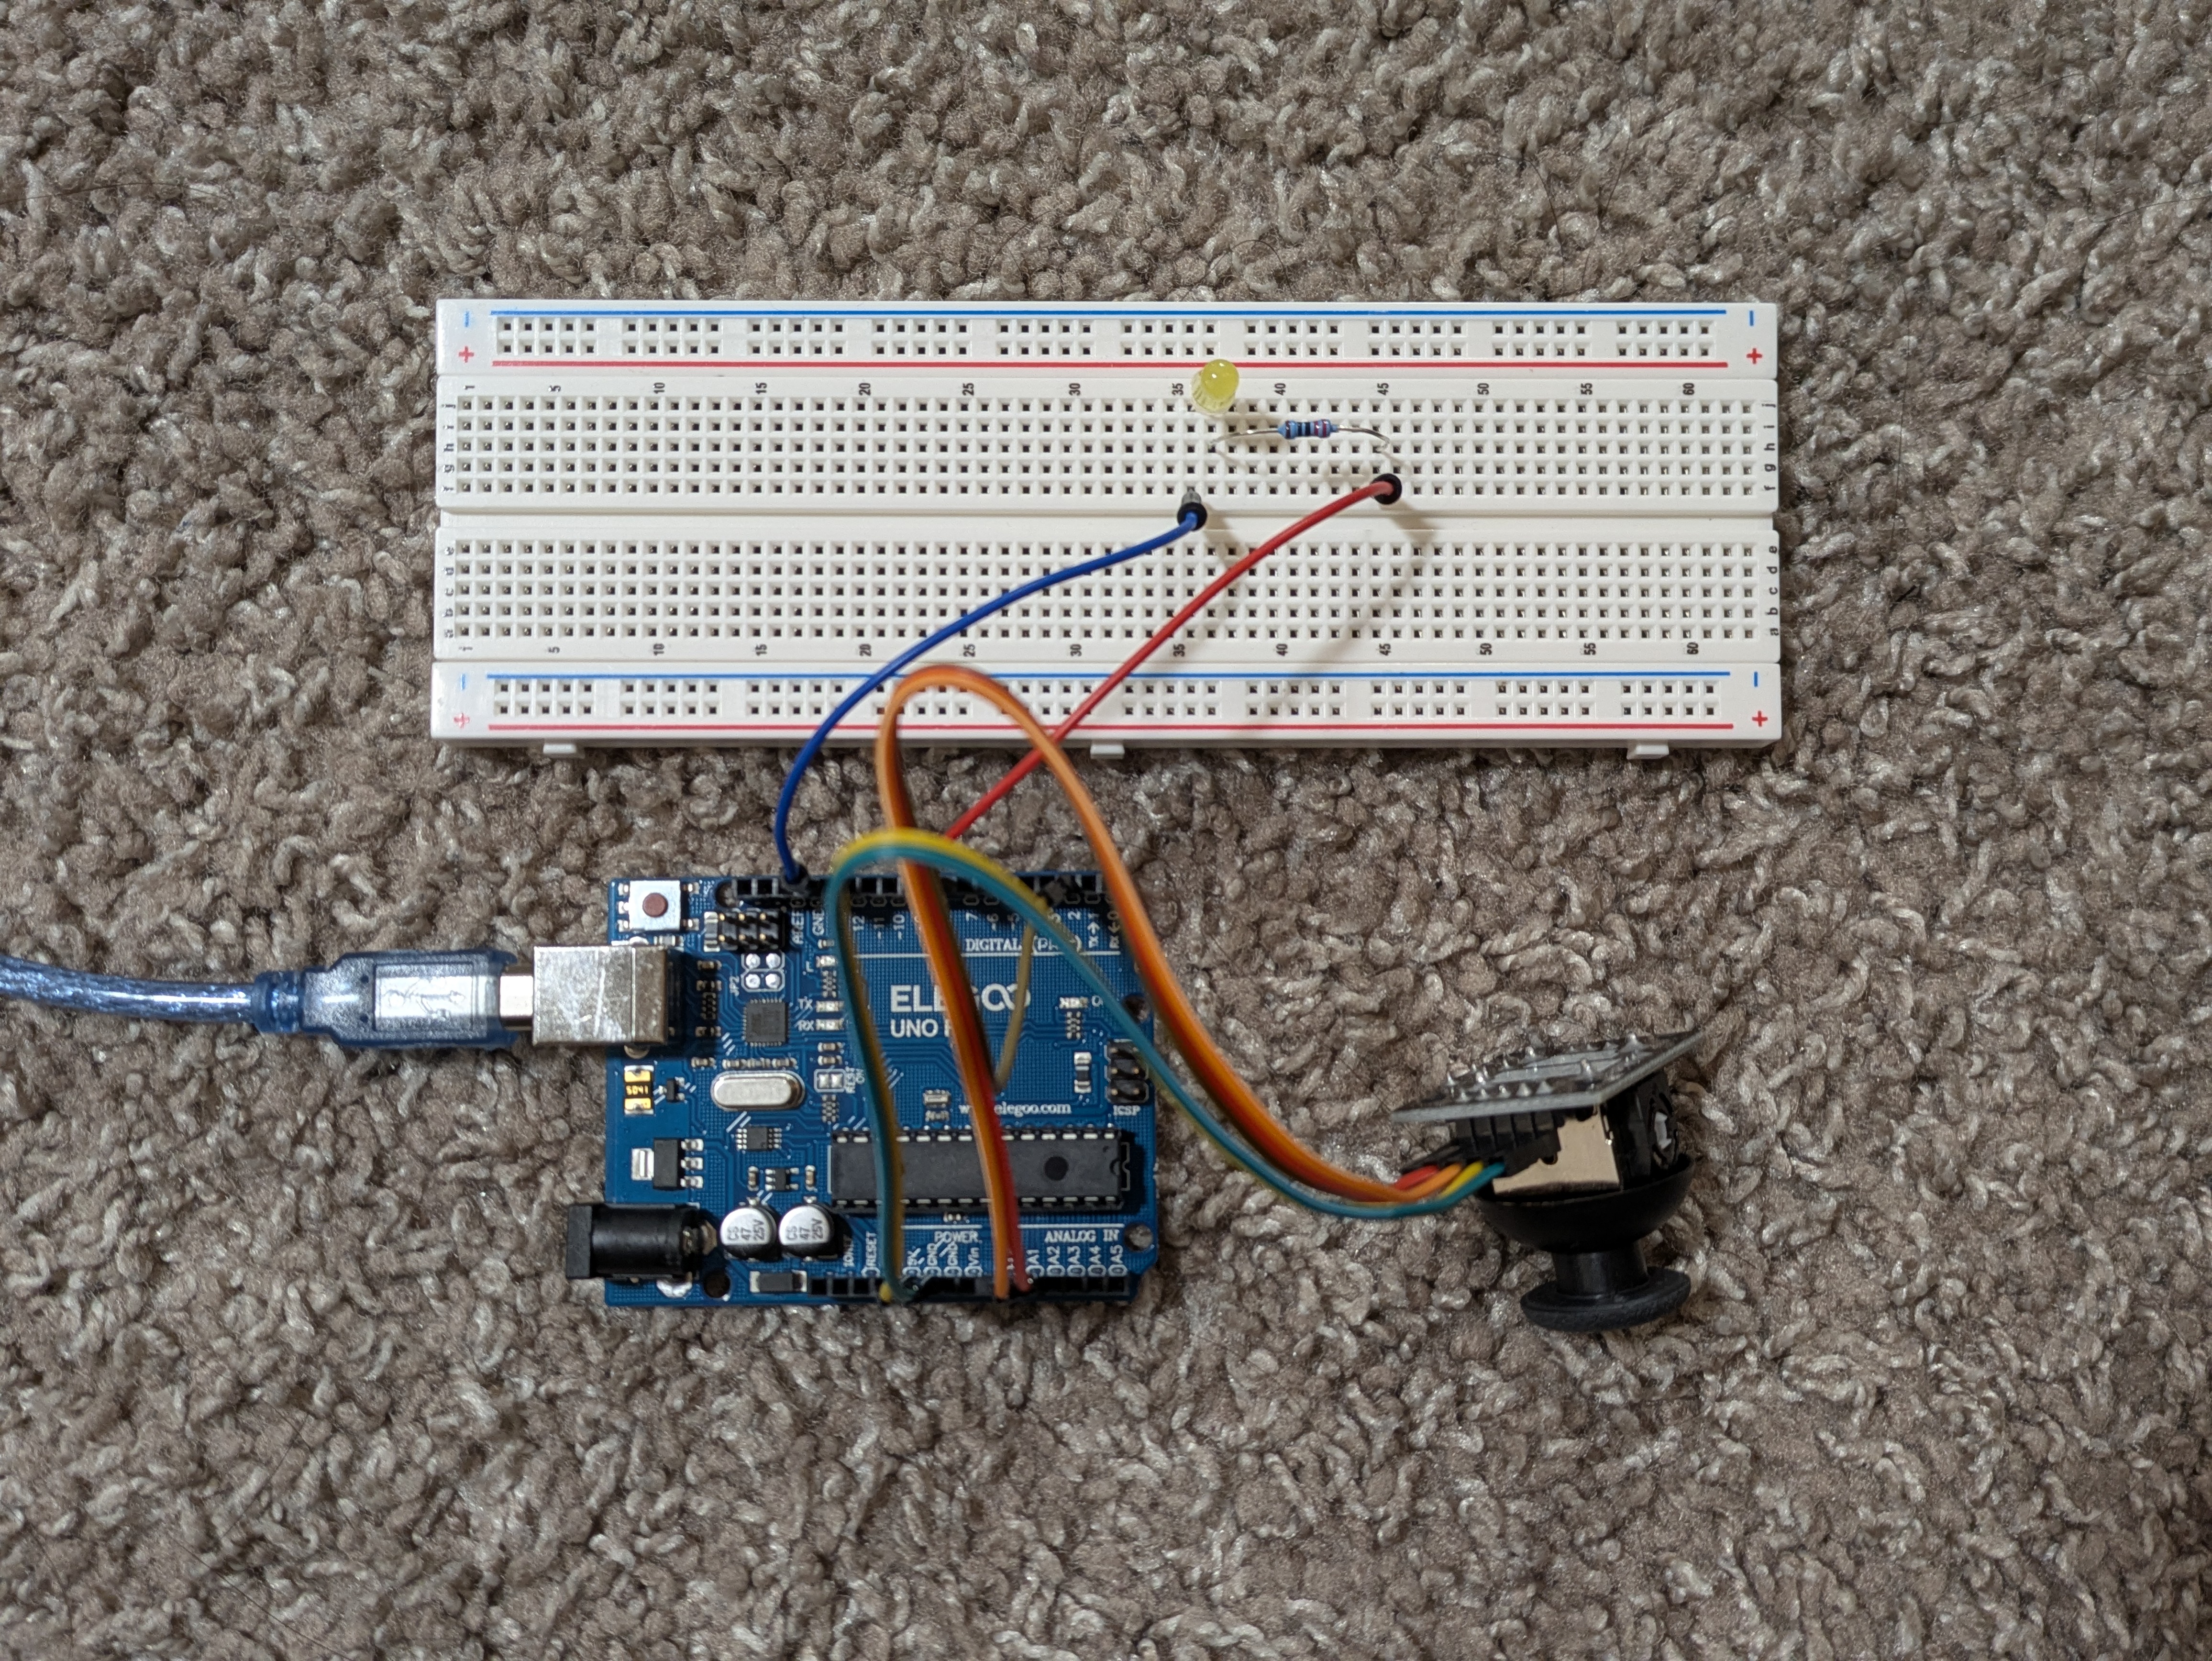
Circuit
Firmware
link to code file
/*
  Web

  with help from servo-with-gui by Blair Subbaraman

  Prints 3 input values (X, Y, switch) from the joystick to serial output.
  Reads a boolean 1 or 0 from serial input to turn on or off the output device.

  The joystick is connected to X pin A0, Y pin A1, switch pin 2.
  The output device is connected to pin 7.

  2025 November 18
  Heidi Wang
*/

// pin for joystick X input
int xPin = A0;
// pin for joystick Y input
int yPin = A1;
// pin for joystick switch input
int switchPin = 2;
// pin for output device
int outputPin = 8;

// runs once
void setup() {
  // begin serial communication
  Serial.begin(9600);
  // provide power to the switch to allow it to begin working
  digitalWrite(switchPin, HIGH);
  // initialize the output pin as output
  pinMode(outputPin, OUTPUT);
}

// repeats indefinitely
void loop() {
  // write the x value from the joystick
  Serial.print(analogRead(xPin));
  // write a comma to delimit values
  Serial.print(",");
  // write the y value from the joystick
  Serial.print(analogRead(yPin));
  // write a comma to delimit values
  Serial.print(",");
  // write the switch value from the joystick and a \n char to complete a transmission
  Serial.println(digitalRead(switchPin));

  // if there's serial data
  if (Serial.available() > 0) {
    // read it
 	  int val = Serial.read();

    // use it to update the output pin
 	  if (val==1) {
      digitalWrite(outputPin, HIGH);
    }
    if (val==0) {
      digitalWrite(outputPin, LOW);
    }
  }

  // delay between actions
  delay(50);
}
Web

Web Code
link to code file
/*
  index.js for Web

  with help from index.js for servo-with-gui by Blair Subbaraman

  Reads 3 input values (X, Y, switch) from serial.
  X and Y move the target in a direct mapping.
  Pressing the button (closing the switch) hides the target.
  Mousing over the target (i.e. when it is visible) writes a boolean 1 or 0 output to serial.

  2025 November 18
  Heidi Wang
*/

// this should match the baud rate in your Arduino sketch
const BAUD_RATE = 9600;
// these are used for setting up the serial connection
let port, connectBtn;


// storing the last value sent to Arduino
let lastVal = false;
// keeping track of the angle to send to Arduino
let currVal = false;
// reading data back in from Arduino
let [xRead, yRead, switchRead] = [0,0,0];


// runs once
function setup() {
  // Run our serial setup function (below)
  setupSerial();

  // Create a canvas that is the size of our browser window.
  // windowWidth and windowHeight are p5 variables
  createCanvas(windowWidth, windowHeight);
}


// repeats indefinitely
function draw() {
  // read any data coming in from Arduino
  receiveData();

  // draw background a medium purple
  background(109, 0, 198);

  // if button is not pressed
  if (switchRead) {
    // set the target size
    let size = 56;
    // map the input x value on the analog pin read scale of 0-1023 to an x value to draw scaled to the window width
    let xDraw = int(map(xRead, 0, 1023, 20, windowWidth-size-20));
    // map the input y value on the analog pin read scale of 0-1023 to a y value to draw scaled to the window height
    let yDraw = int(map(yRead, 0, 1023, 20, windowHeight-size-20));

    // set the fill color to a light purple
    fill(195, 122, 255);
    // remove stroke color and width
    noStroke();
    // draw the target as a square
    rect(xDraw, yDraw, size);

    // if mouse is over the target
    if (xDraw <= mouseX && mouseX <= xDraw+size && yDraw <= mouseY && mouseY <= yDraw+size) {
      // set value to send to Arduino as true
      currVal = true;
    // else mouse is not over target
    } else {
      // set value to send to Arduino as false
      currVal = false;
    }

    // display values - uncomment for debugging
    // displayHUD(xDraw, yDraw);
  // if button is pressed
  } else {
    // set value to send to Arduino as false
    currVal = false;

    // display values - uncomment for debugging
    // displayHUD(-1, -1);
  }

  // send data out to the Arduino
  // if the value has changed since it was last sent
  if (lastVal != currVal) {
    // log a console message to show that we are writing to port
    console.log('writing', currVal, 'to port');
    // write the true/false value to the Arduino as a number 0/1
    port.write(Number(currVal));
    // update the last value sent for tracking whether the value has changed
    lastVal = currVal;
  }
}

// displays values - used for debugging
function displayHUD(xDraw, yDraw) {
  // set the fill color to a dark purple
  // fill(92, 0, 168);
  // remove stroke color and width
  // noStroke();
  // draw a rectangle as the background for the HUD
  // rect(80, 60, 240, 370);

  // set the fill color to a light purple (lighter than the target color)
  fill(220, 178, 255);
  // p5 text settings. BOLD and LEFT are constants provided by p5.
  // See the "Typography" section in the p5 reference: https://p5js.org/reference/
  textFont("system-ui", 50);
  textStyle(BOLD);
  textAlign(LEFT);
  textSize(22);
  // values drawn on the screen
  text(`Last Value: ${lastVal}`, 100, 100);
  text(`Current Value: ${currVal}`, 100, 150);
  text(`Switch Read: ${switchRead}`, 100, 200);
  text(`X Read: ${xRead}`, 100, 250);
  text(`Y Read: ${yRead}`, 100, 300);
  text(`X Draw: ${xDraw}`, 100, 350);
  text(`Y Draw: ${yDraw}`, 100, 400);
}

function receiveData() {
  /**
   * Receive data over serial from your Arduino
   * We're terminating data with a newline character here
   * i.e., we need to Serial.println() in our Arduino code
   */
  // Check whether the port is open (see checkPort function below)
  const portIsOpen = checkPort();
  // If the port is not open, stop drawing for this run of the loop
  if (!portIsOpen) return;

  // Read from the port until the newline
  let str = port.readUntil("\n");
  // If we didn't read anything, stop drawing for this run of the loop
  if (str.length == 0) return;

  // Trim the whitespace (the newline) and split on commas.
  [xRead, yRead, switchRead] = str.trim().split(",");
  // Convert the strings to numbers.
  [xRead, yRead, switchRead] = [Number(xRead), Number(yRead), boolean(Number(switchRead))];
}

// Three helper functions for managing the serial connection.

function setupSerial() {
  port = createSerial();

  // Check to see if there are any ports we have used previously
  let usedPorts = usedSerialPorts();
  if (usedPorts.length > 0) {
    // If there are ports we've used, open the first one
    port.open(usedPorts[0], BAUD_RATE);
  }

  // Create a connect button
  connectBtn = createButton("Connect to Arduino");
  // Position the button in the top left of the screen.
  connectBtn.position(5, 5);
  // When the button is clicked, run the onConnectButtonClicked function
  connectBtn.mouseClicked(onConnectButtonClicked);
}

function checkPort() {
  if (!port.opened()) {
    // If the port is not open, change button text
    connectBtn.html("Connect to Arduino");
    // Set background to gray
    background("gray");
    return false;
  } else {
    // Otherwise we are connected
    connectBtn.html("Disconnect");
    return true;
  }
}

function onConnectButtonClicked() {
  // When the connect button is clicked
  if (!port.opened()) {
    // If the port is not opened, we open it
    port.open(BAUD_RATE);
  } else {
    // Otherwise, we close it!
    port.close();
  }
}
Full Project
link to website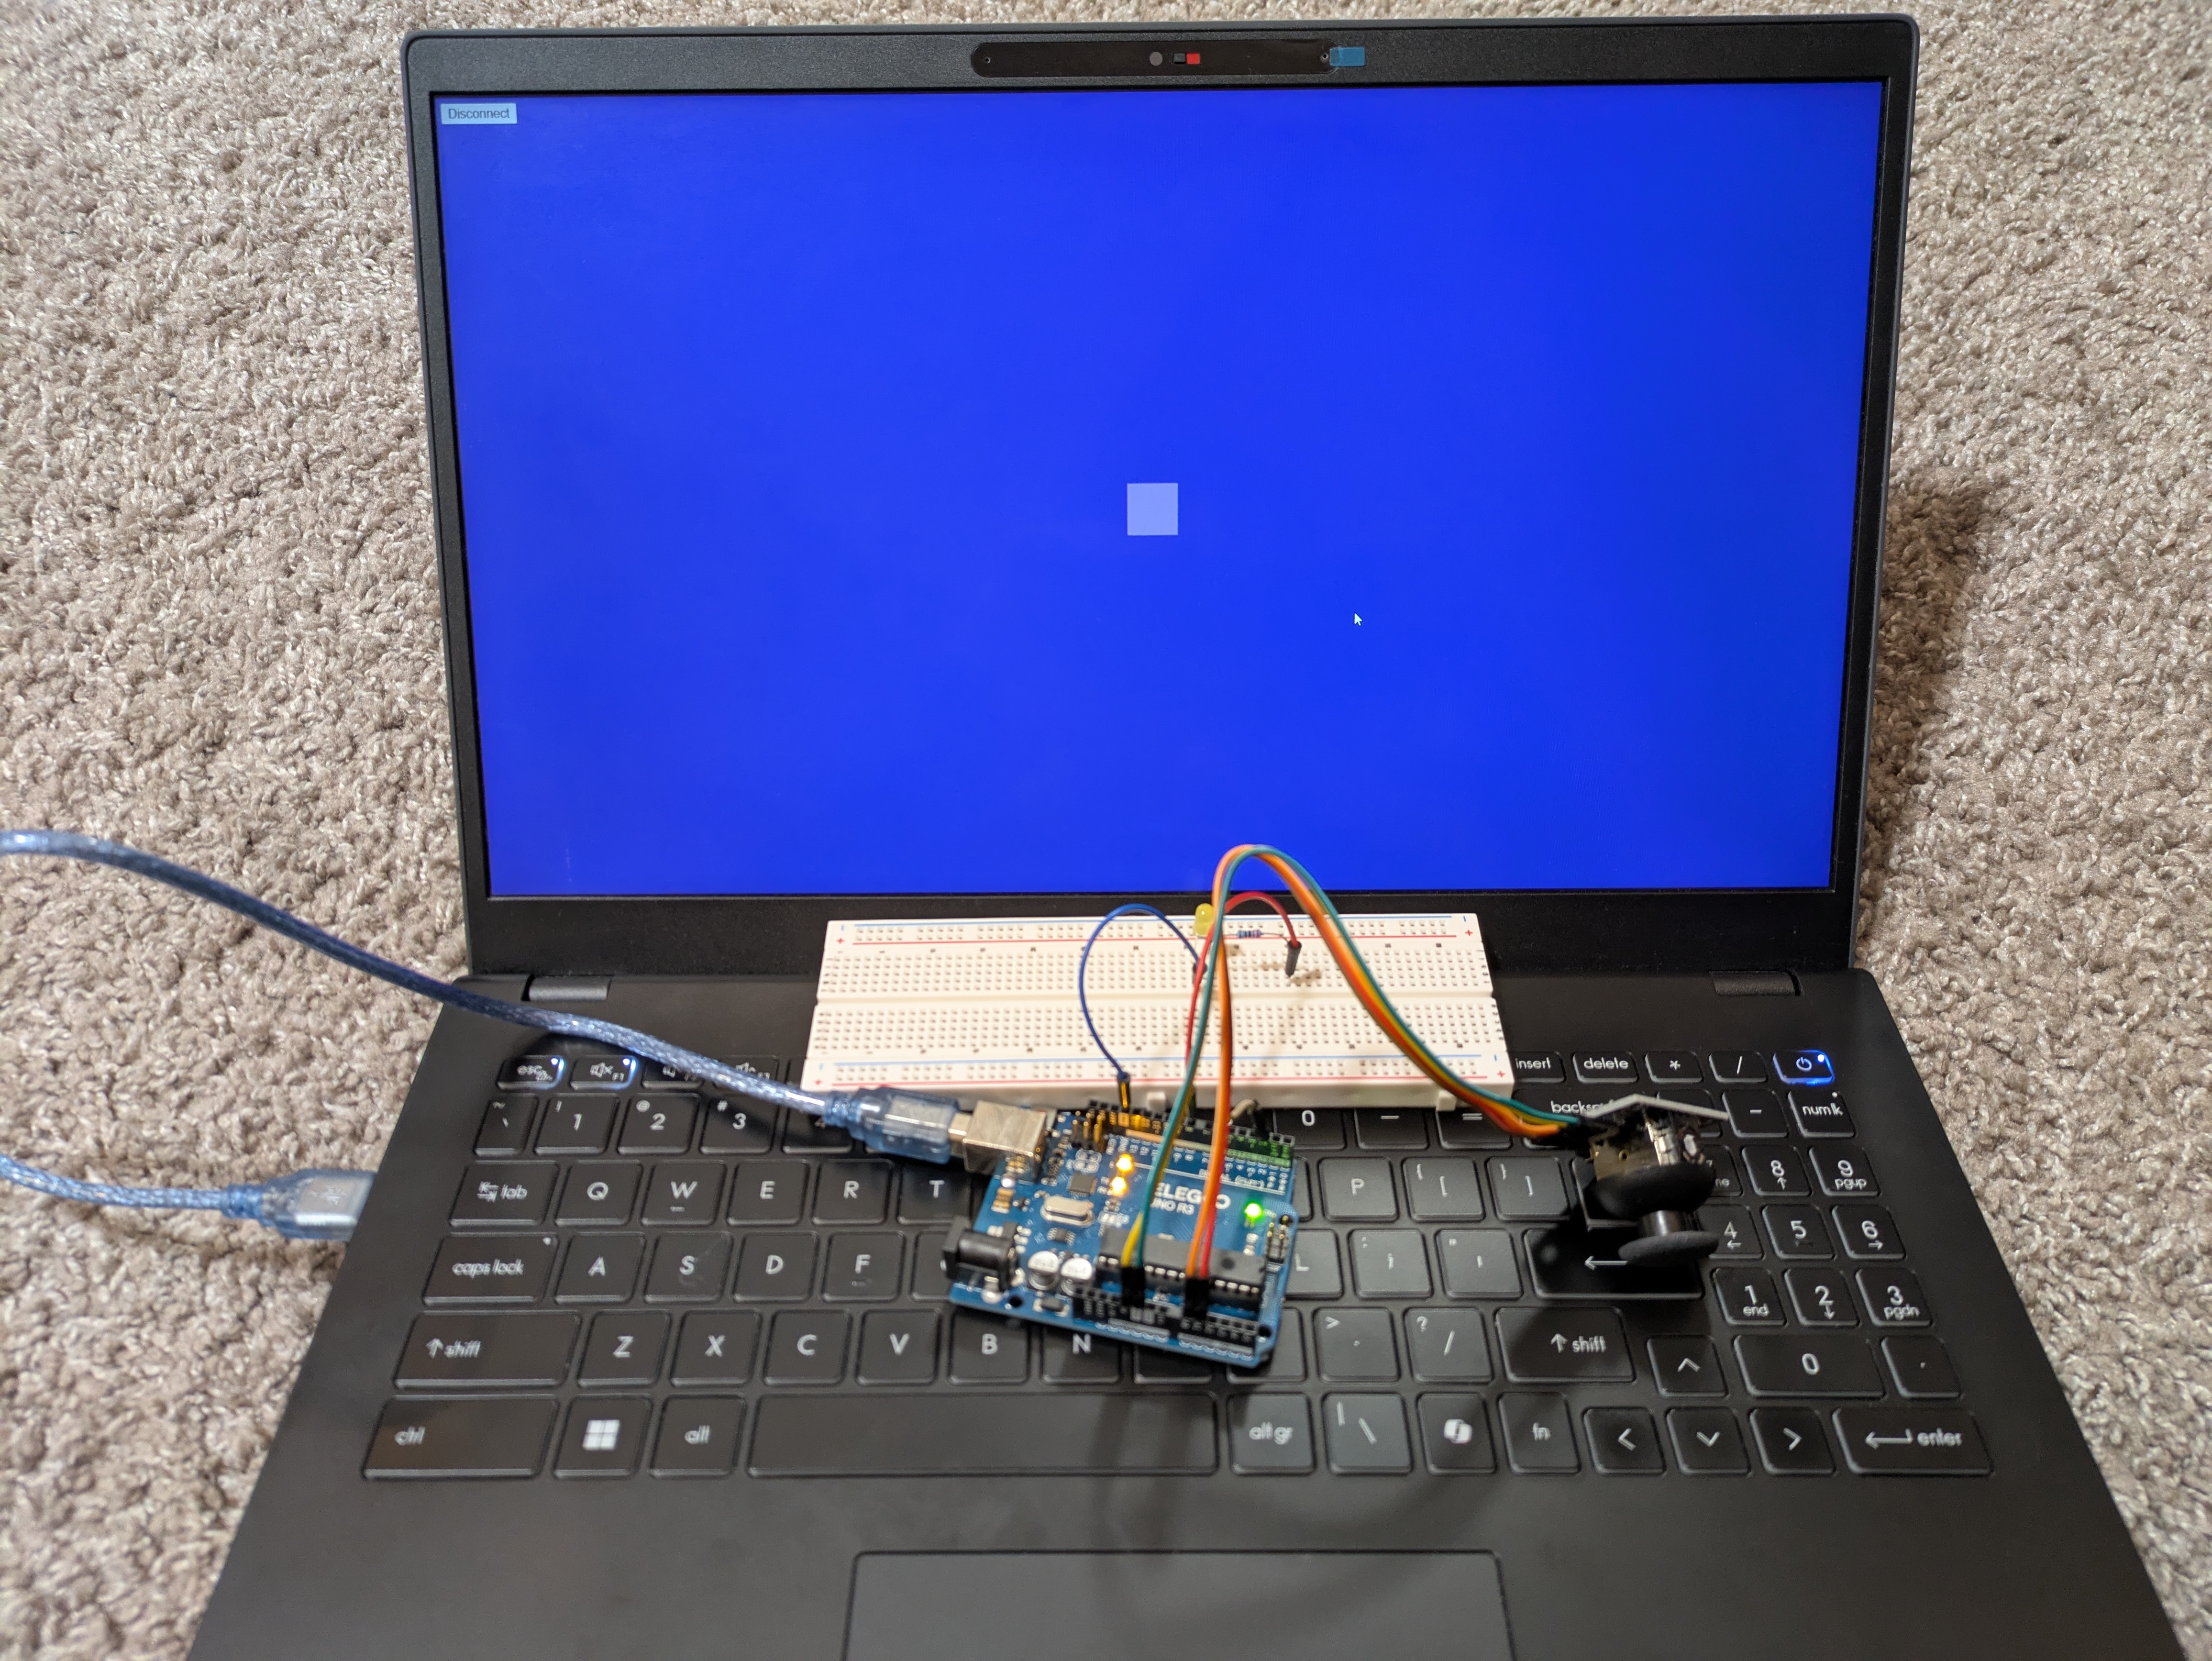
Operation
Questions
None